The Personal Space Dress is a dress that uses an ultrasonic sensor to detect when someone, or something, is too close to it. Then, it uses continuous rotation servo motors to expand the dress and protect your personal space.


Difficulty Level: Intermediate/Advanced
(basic knowledge of Arduino, soldering and hand tools)
Supplies
1.Make the Structure
i.Take Apart Umbrella
ii.Make the Belts
iii.Deodorant Linear Actuator
2.Wire and Test
i.Calibrate Motors
ii.Test the movement
iii. Solder
3. Insulate the structure and drape the fabric
i.Pocket the electronics
ii. Smooth sharp parts
iii. Drape Fabric
(note: if you don’t know where to buy these things, check out the resources page)
Electronics:
-1 Arduino Uno
-4 continuous rotation servo motors, I used these micro ones from Spark Fun, but I’d be curious to know if the next size up, standard-size, work better.
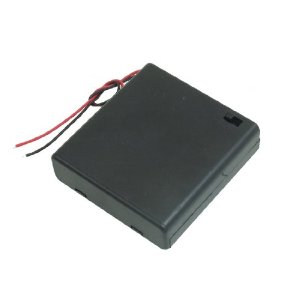
-1 battery pack that holds 4 AA’s, to give 6 volts. (you may need more if you use bigger motors).
-2 ultrasonic distance sensors, such as this one, or any proximity sensor.
-1 breadboard
-1 pcb for soldering
-20 jumpers wires
-1 9V battery clip for Arduino
Structure:
-1 18 x 24″ piece of plexiglass, acrylic, or cardboard
-1 umbrella that you can take apart
-4 empty deodorant containers that have a twist mechanism at the bottom, such as one of these:

I don’t think the brand matters, but I do think a bigger container is better because there’s slightly more displacement.
-wire or string
-Drill and/or laser cutter, box cutter, heat gun, gloves, duct tape, hot glue gun, pliers
-Packing foam
-Mat board
Dress:
-3-5 meters of the fabric of your choice
-velcro
-basic sewing supplies
-fabric dye (optional)
-hot glue gun
The structure is the most difficult part, and the most important part. It controls the movement of the dress and gives that great expansion feature we are looking for!
1. Take apart an umbrella. If you’re like me, you have one of these lying around the house that you’ve been refusing to admit is broken. To take it apart, you need a pair of pliers.
-Start by cutting the strings that hold the fabric to each leg.

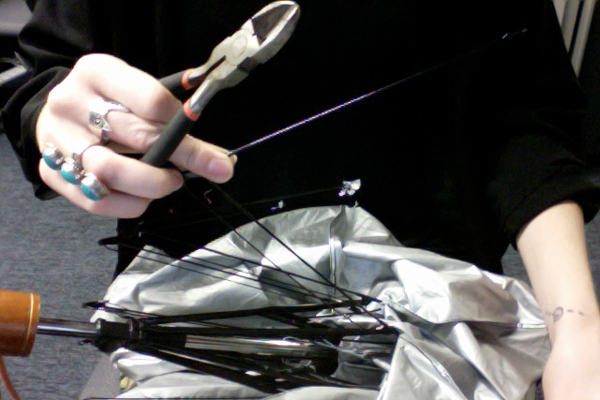
– Do this until each leg is free and you can remove the fabric entirely.

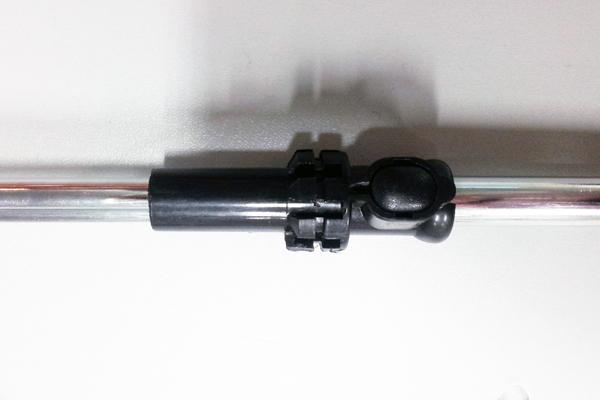
-Most umbrellas are secured in two places at the top and middle, by a ring of wire that looks like this:


-Cut or untwist the wire and slide each piece off of it.
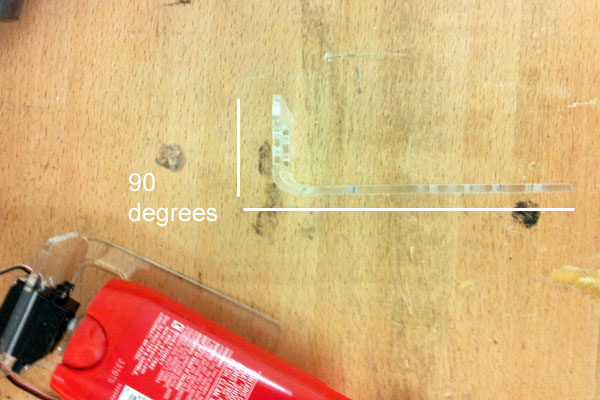
-You will end up with 8 free umbrella arms. Observe how your umbrella arm expands and contracts.

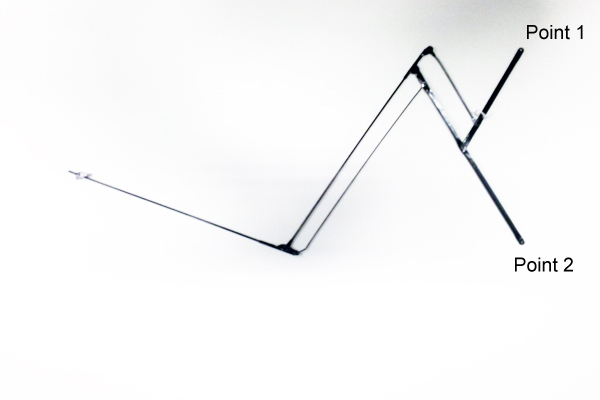
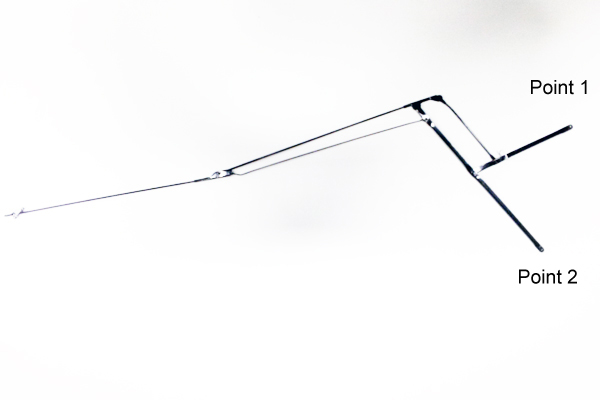
When Point 1 and Point 2 are further apart, the umbrella is closed. When Point 1 and Point 2 are close together, the umbrella is open.
We will use this concept to control the dress. All of the Point 1 pieces will be attached to a belt around the waist, this piece will be stationary. All of the Point 2 pieces will be attached to a belt around the thighs, this piece will be pulled up and down by the motors.

2. Make the belts and attach the umbrella arms.
We will do the belts in two halves, because otherwise it’d be impossible to put the dress on. Each half will have four arms attached, and end up looking like this:

You can see the arms are closed in this picture, because Point 1 and Point 2 are far apart. (Sorry for using clear plastic to make the belts ! Not great for photos).
So, how should you make your belts? I laser cut mine, which I think is ultimately the fastest way. You can download my file here
it looks like this:

But if you don’t have access to a laser cutter, you could try making the shape out of cardboard, or cutting strips from something that is already in a semi-circle, like a plastic bucket. Then you can use a drill to make your holes.
The belts need:
-4 sets of two holes each, for securing the arms to the belts.
-Belt 1 should be thicker, because it will eventually hold the motors. It should have additional holes on both ends for lacing the two halves together. I also added holes for my sensor.
-Belt 2 can be thinner.
-Try to form a semi-circle shape that fits over your hips and thighs. Belt 2 especially should not fit the body too closely, I made mine a little too tight and the back piece had trouble moving up over my backside. Whoops!
I used a heat gun to bend my plastic into this shape, be sure to use gloves.
-Remember, you need two sets of each belt ! One set for the front of your body, one for the back.
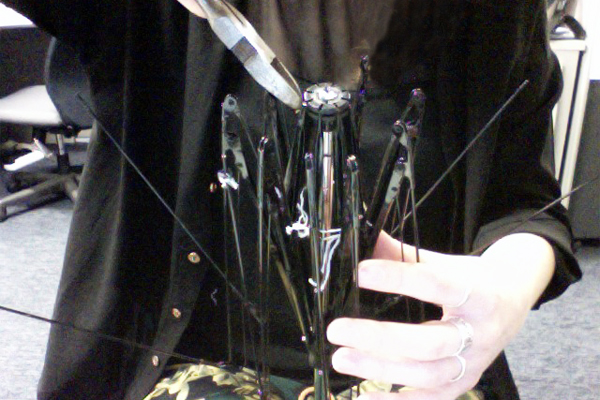
-When your belts are finished, secure all of the top pieces of your umbrella arms to Belts 1, and all the lower pieces to Belts 2. Use strong string or thin wire.
-Hold both halves up to your body and see how they fit. You will tie both sides together like a corset when its time to wear them.

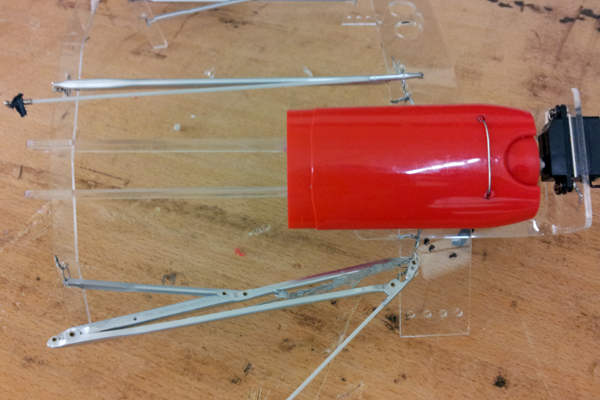
My (male) mannequin models one half of the structure.
Part 3: Make your deodorant linear actuators.
Linear actuators are motors meant specially for vertical motion. They normally look like this:
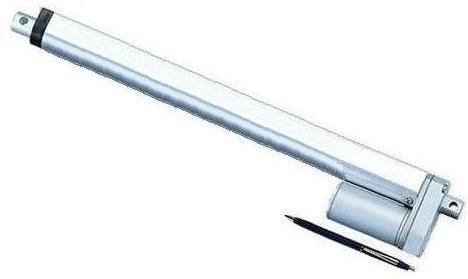
However, it’s hard to find small linear actuators and they are usually expensive. This actuator looks promising, but it’s $90 per piece!
A google search for DIY actuators lead me to this brilliant video on Make Magazine, which shows the concept of making linear actuators out of deodorant sticks. Basically, when you spin your deodorant dial to make the stick rise and fall, you are translating horizontal motion into linear motion. This is great because normal motors are spinning on a horizontal plane, and now we can translate this into vertical motion.
So, get your four deodorant cases ready! If they aren’t empty, you can take out the stick and put it in a ziplock for later use. Save the little plastic piece that the deodorant normally sits on. Here’s what’s going to happen:

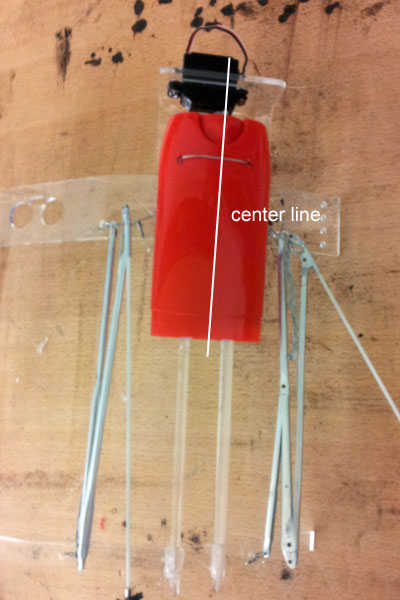
We are going to secure two deodorant cases to each half of Belt 1, along with motors that will spin the dial. We will attach push sticks to the piece that normally holds deodorant, and these will push and pull Belt 2.

These are the three pieces we need for each set (x4 sets). Lets start with piece A: Clean out your deodorant and save the plastic piece for use in piece C.

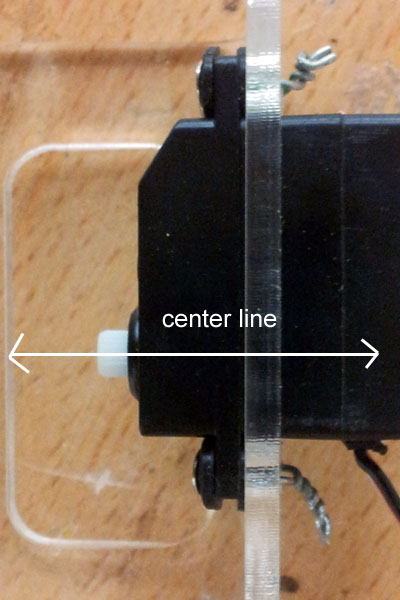
Select an attachment from your servo and hot glue it, face down, into the base of the deodorant’s spinning piece. This will allow the motor to attach to the piece, and spin it. Make sure the attachment sits flat, if it’s angled it will cause problems.
Piece B: This piece will hold your deodorant stick and your motor base stationary, while the rotating pieces moves freely. I laser cut this out of plexiglass, using this file.
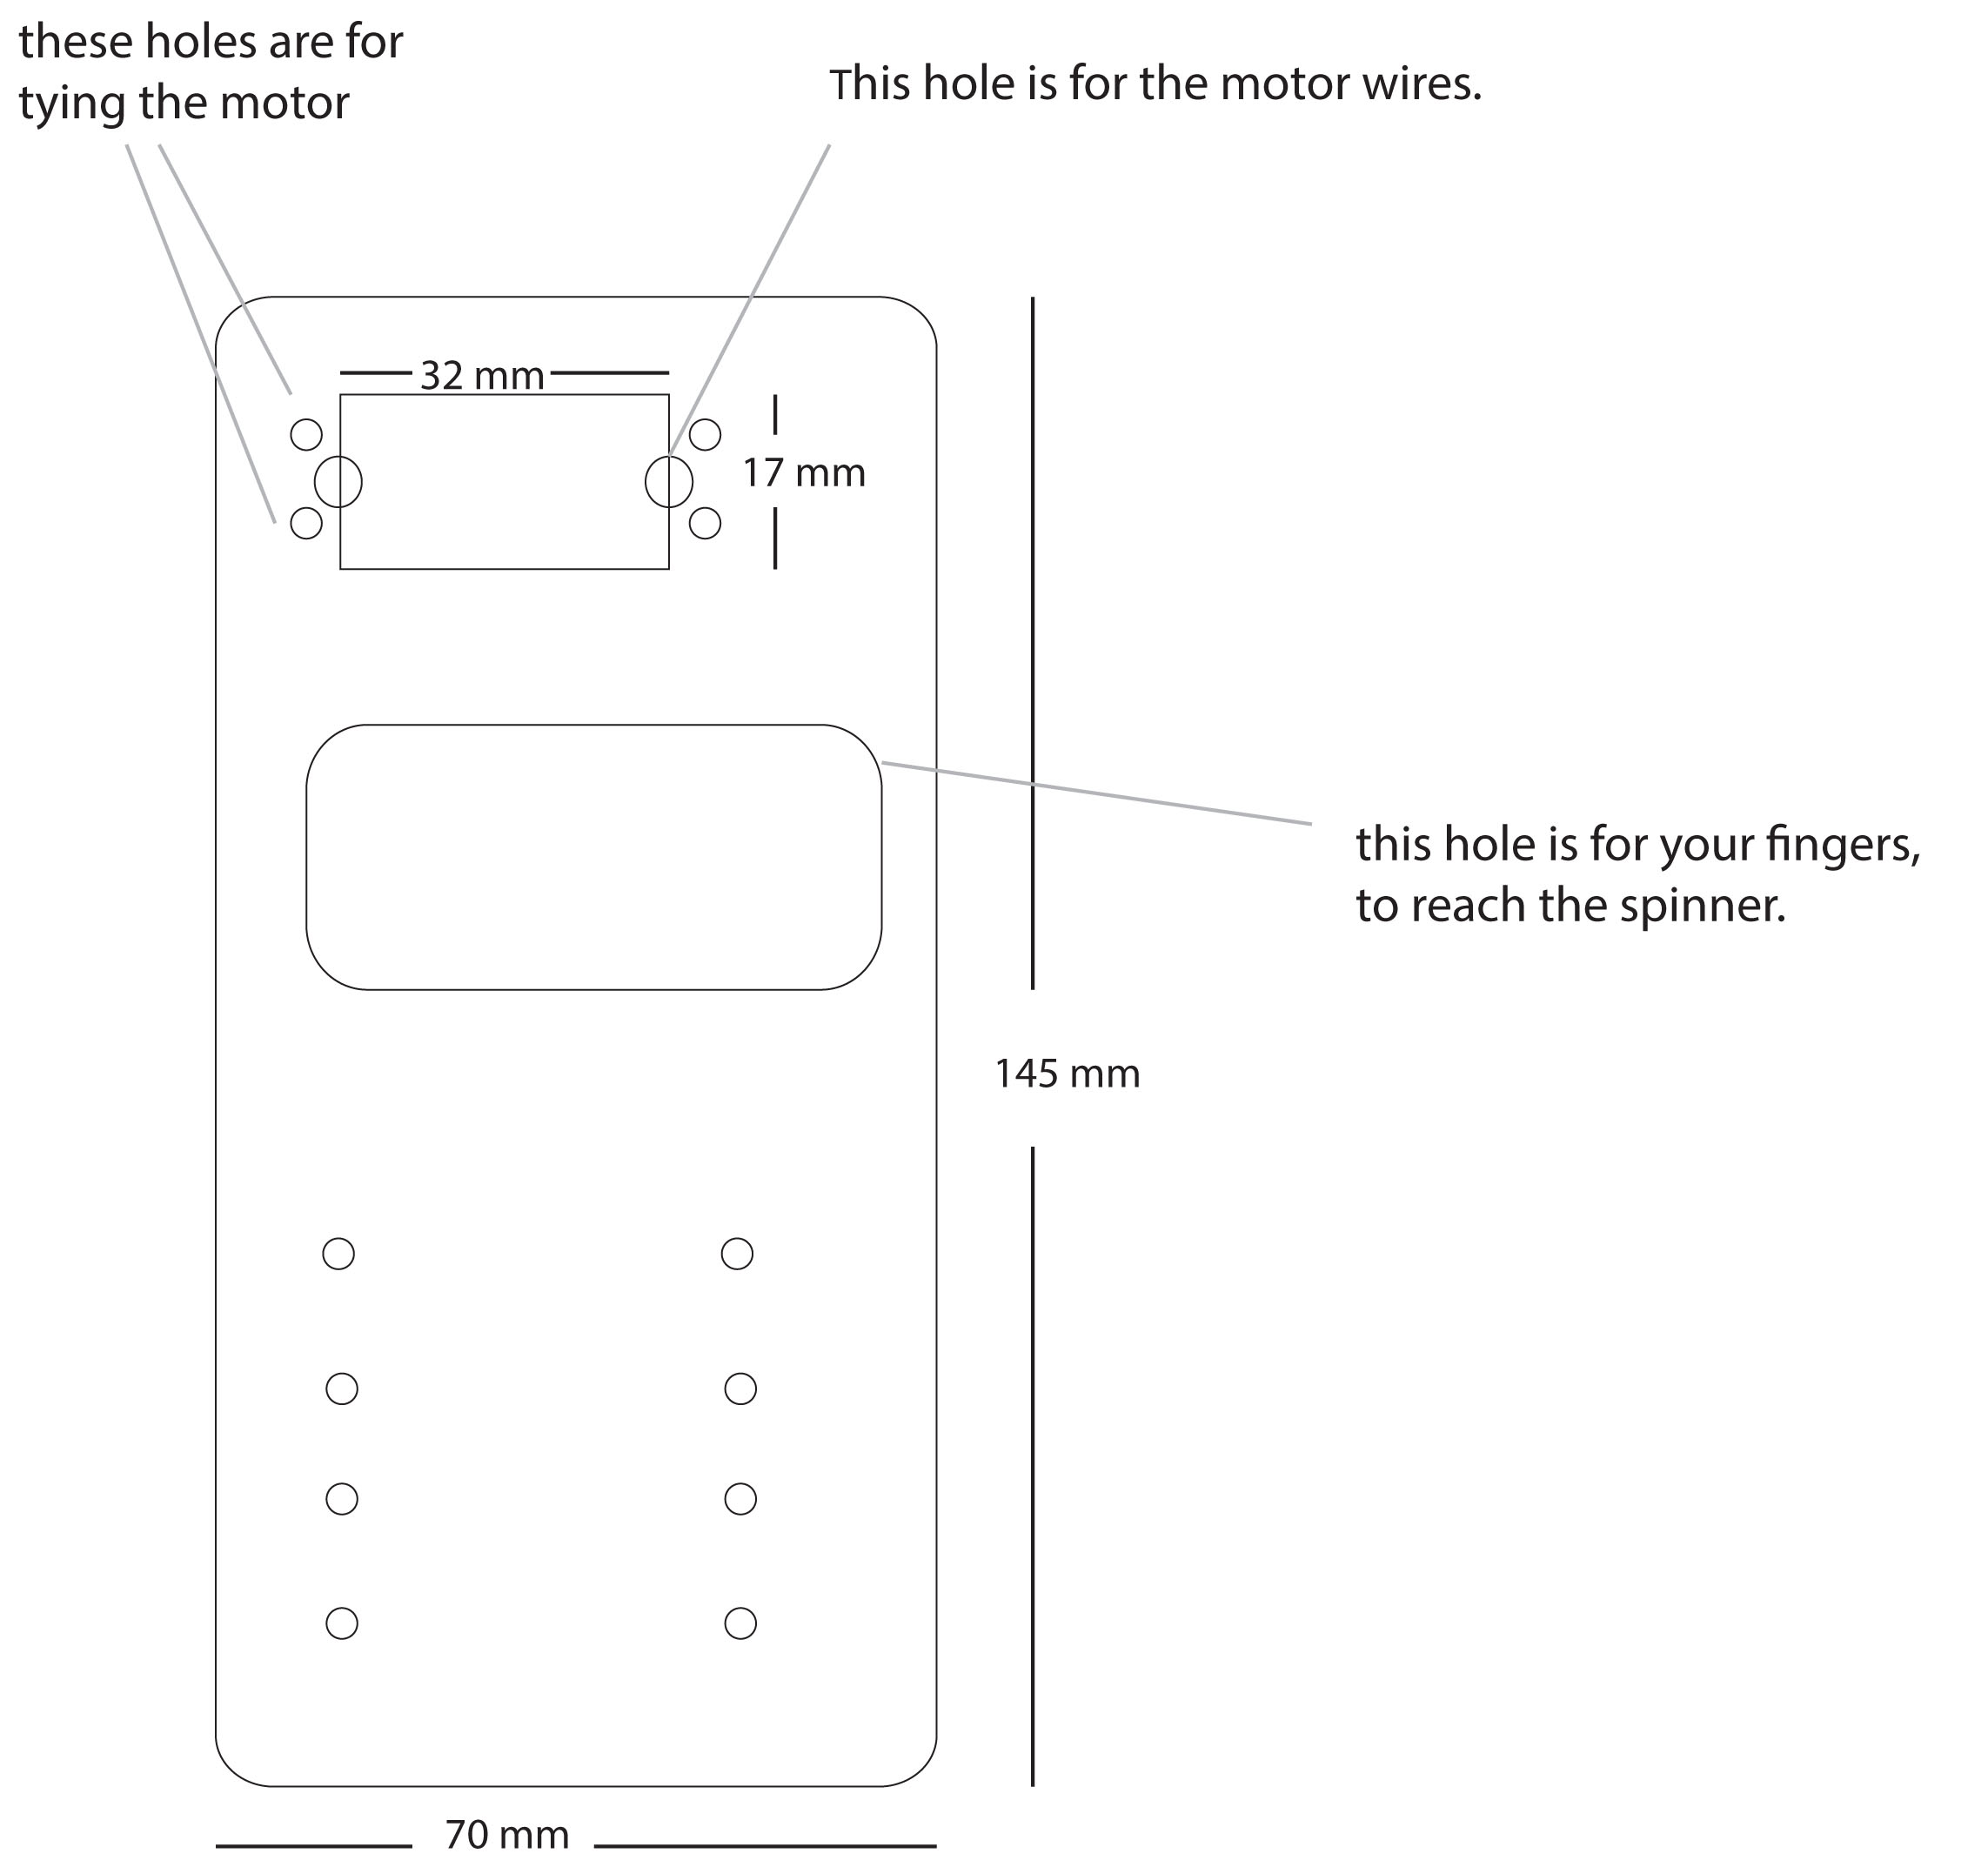
Make sure the rectangle you cut out fits your motors perfectly, and include holes for the motor wires to pass through.
You may wonder why the motor hole is off center. This is because the shaft is not centered within the motor, so I had to compensate. The shaft should line up with the center of the deodorant.
The other holes in Piece B are optional, I found the small holes helpful for securing it to the belt, and the I added the larger hole so that I could I reach the spinner on the deodorant with my fingers. This is useful, I recommend adding it.
Once you have all the holes you need, bend your piece at a 90 degree angle.
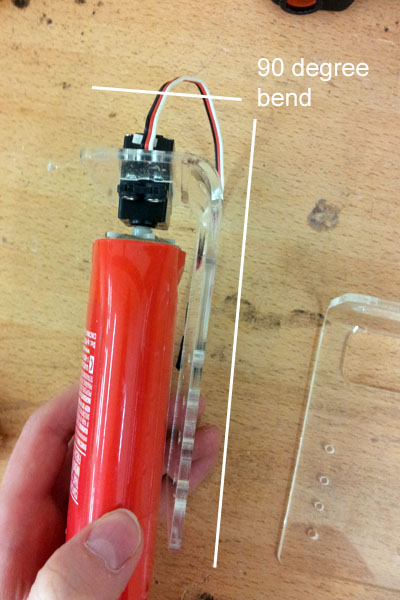
This will allow the motor to neatly fit into the attachment on the deodorant stick, while the rest of the plastic piece fits neatly against the deodorant body. I used a heat gun again to make this bend.
-Once Piece B is bent, secure your motor to it tightly, using wire. Then snap it into the attachment on the deodorant stick. You will find that the deodorant stick is not secure and can still move around, we need to secure it more tightly, but first we will start Piece C.
Piece C:
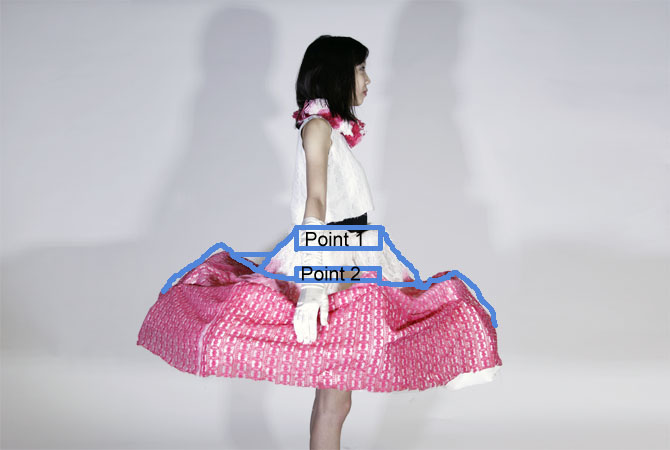
We need two long “push sticks,” for each deodorant case, that’s eight total. To decide the length of your sticks, we need to know how much Belt 2 needs to move higher. Raise and lower Belt 2, (opening and closing the arms) to determine how far the belt needs to travel. Basically, you are measuring this distance:
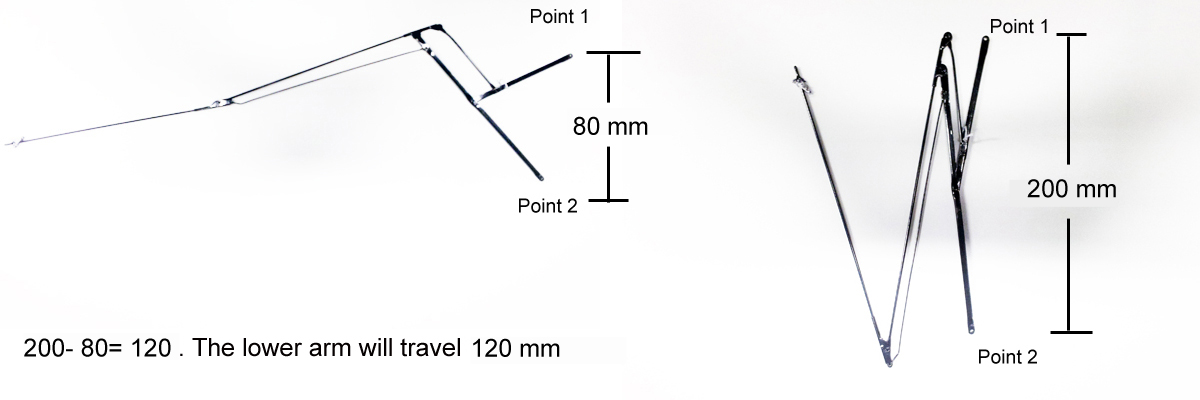
So we need to make sure we have enough room for the lower belt to travel 120 mm (if your umbrella is the same as mine). Therefore, we must position the deodorant +motor 120 mm away from Belt 2.

The push sticks will help maintain this distance. I added 10 mm to either end of my sticks so they have room to grab onto Belt 2 and the deodorant. I laser cut them out of acrylic. You can download my file here

Note, I don’t think cardboard will be a good substitute in this case, because it will buckle under the weight. Better to use strips of plastic or wood.
Once you have your push sticks made, use hot glue or epoxy to secure them to the deodorant piece:
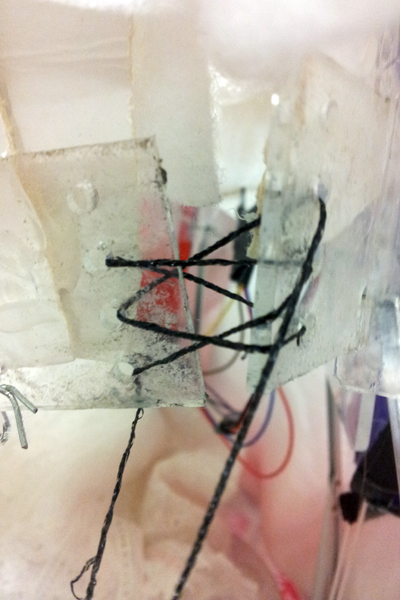
Hot glue worked well for me. Don’t glue the other end to the Belt yet, first check the position of the deodorant again. We need to drill holes through the deodorant to secure it to the belt. I also had to drill new holes into my belt (black dots) because my first holes were wrong! Would’ve been easier to drill the piece before I bent it…
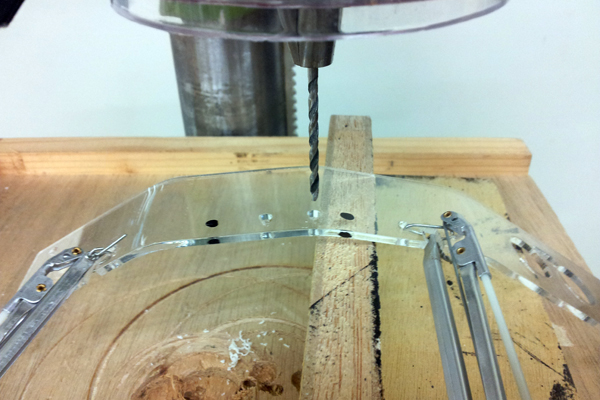
Luckily I have access to a drill press, but a standard hand drill would do the trick too! I drilled my holes as close to the base as I could on the deodorant, because I didn’t want to limit the movement of the moving piece.
Then I used a piece of wire to tie all three pieces together, the deodorant stick, the belt, and the motor piece. As you can see, the wire goes right through the stick, and it stops the the moving piece from going any higher. That’s why I drilled it so high. Hope that makes sense!
So, repeat the steps until you have two of these bad boys, and all four motors are secured.
Once you’ve done that, take a break! Eat some snacks! The structure was the most time consuming part for me, you should be proud it’s done. 🙂
I ended up adding more hot glue to the sides of my deodorants to keep them even more secure, but I would recommend testing it before you do that, to make sure you’ve got all your placement correct!
Your continuous rotation servo should have a tiny screw on the bottom that looks like this:
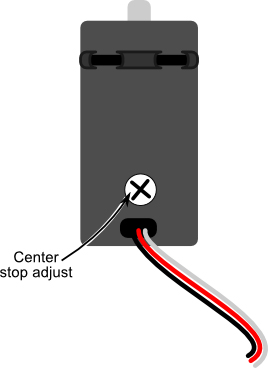
You’ll need a small screwdriver to access it. Connect your motor to your Arduino and very slowly adjust this screw with the following code running. Stop adjusting the screw when the motor shaft is completely at rest. This will give you a base “off” setting.
#include <Servo.h>
Servo myServo;

void setup() {
  myServo.attach(9);
  myServo.writeMicroseconds(1500);  // Stop
}

void loop() { }
Download this sketch and see the full servo tutorial here on the parallex web page. If this code doesn’t work with your motor, try checking the manufacturer’s website, they should have some sample code.
ii. Test the movement.
Start by wiring up one half of the dress to a breadboard. Be sure to use a separate power supply for your motors, because they will draw a lot of current, but to connect the ground to Arduino.
By the way, I advise using a battery pack with an on/off button so you can easily stop the motors from moving.
Your wiring should look something like this:
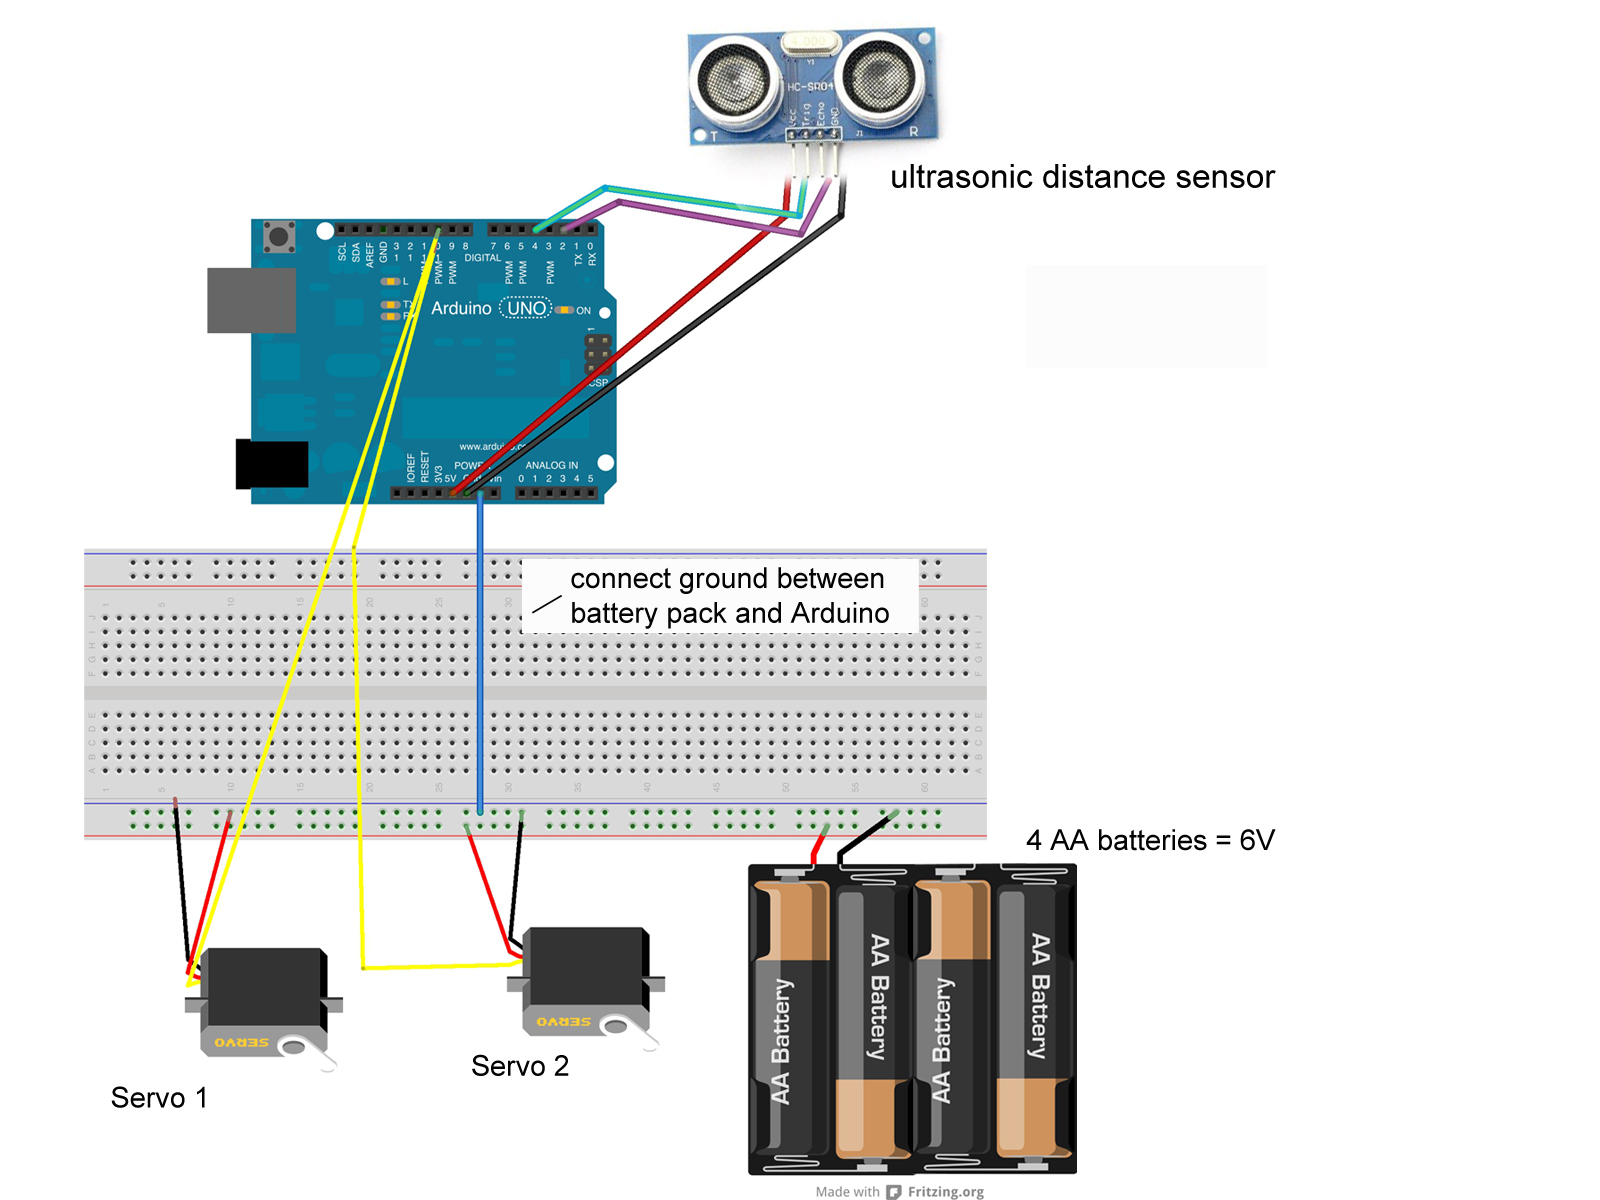
This is the code I used for the whole dress together, so it has four motors and 2 sensors included. I decided to allow any detection from either sensor to open the whole dress, but you could easily change it to allow motion detected in the back of the body to only open the back motors, or vice versa. You can also change the range that will deploy the motors.
I would advise to plug in one set of motors and 1 sensor at a time to test it. You may have to alter the time on the motor delays, depending on how long it takes your motor to fully open and close. I found that my dress took longer to open than to close, because the motors moved slower.
Lastly I have the onboard led lighting up when there is a detection, this is useful for troubleshooting when you aren’t plugged into the computer and can’t read the serial.
#include <Servo.h>

Servo myServo;
Servo myServo2;
Servo myServo3;
Servo myServo4;
int led = 13;

const int TRIG_PIN = 4;
const int ECHO_PIN = 2;
const int TRIG_PIN2 = 12;
const int ECHO_PIN2 = 11;

void setup() {

  Serial.begin(9600);
  myServo3.attach(5, 1300, 1700);
  myServo4.attach(6, 1300, 1700);
  myServo.attach(9, 1300, 1700);
  myServo2.attach(10, 1300, 1700);

  pinMode(TRIG_PIN,OUTPUT);
  pinMode(ECHO_PIN,INPUT);
  pinMode(TRIG_PIN2,OUTPUT);
  pinMode(ECHO_PIN2,INPUT);
  pinMode(led, OUTPUT);
}

void loop()
{
  long duration, distanceCm, distanceIn, duration2, distanceCm2, distanceIn2;

  // Give a short LOW pulse beforehand to ensure a clean HIGH pulse:
  digitalWrite(TRIG_PIN, LOW);
  delayMicroseconds(2);
  digitalWrite(TRIG_PIN, HIGH);
  delayMicroseconds(10);
  digitalWrite(TRIG_PIN, LOW);
  duration = pulseIn(ECHO_PIN,HIGH);

  digitalWrite(TRIG_PIN2, LOW);
  delayMicroseconds(2);
  digitalWrite(TRIG_PIN2, HIGH);
  delayMicroseconds(10);
  digitalWrite(TRIG_PIN2, LOW);
  duration2 = pulseIn(ECHO_PIN2, HIGH);


  distanceIn = duration / 74 / 2;
  distanceIn2 = duration2 / 74 / 2;


  Serial.println(distanceIn);
  Serial.println("in, ");
  Serial.println(distanceIn2);
  Serial.println("in2, ");


  delay(1000);
  if((distanceIn <= 15) && (distanceIn > 5))
//modify the range here, I put it at greater than 5 to avoid false positives. it is inches.

   {
    digitalWrite(led, HIGH);
    moveServos();


  }

  if((distanceIn2 <= 15) && (distanceIn2 > 5))

//data from second sensor

{
    digitalWrite(led, HIGH);
    moveServos();
  }

  else{
    myServo.write(90);  // Stop motors
    myServo2.write(90);
    myServo3.write(90);
    myServo4.write(90);
    digitalWrite(led, LOW);

  }
}

void moveServos(){
  Serial.println("moveservos");
  myServo.write(180);  //open
  myServo2.write(180);
  myServo3.write(180);
  myServo4.write(180);
  delay(19000);      //time it takes to full open

  myServo.write(90);  // Stop
  myServo2.write(90);
  myServo3.write(90);
  myServo4.write(90);
  delay(5000);

  myServo.write(0);  //close
  myServo2.write(0);
  myServo3.write(0);
  myServo4.write(0);
  delay(16000); //time it takes to fully close

}
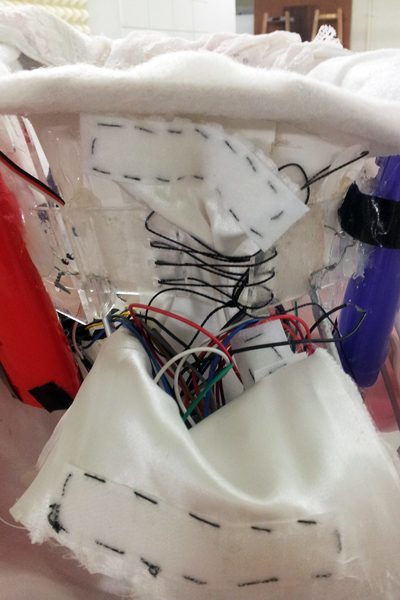
Once you know that both sides are working properly, wire the whole thing together. Now that we are using two sensors at once, we will have to pull the power supply over from the Arduino to the breadboard, but continue to isolate it from the motor power supply, and connect the grounds.

Now as you can see, we have a lot of wires going on so be very careful when soldering your wires to a pcb. I recommend directing them all to one side of the dress, this is the side where we will store the arduino in a little pocket. Make sure your wires are long enough to reach it.

it’s good if you can find a pcb with connected rails like mine, so you can attach all our power to one side, ground to the other, and separate the sensors from the motors. Mine is from “Radio Shaek” 🙂
After soldering, run a test! Make sure it works!
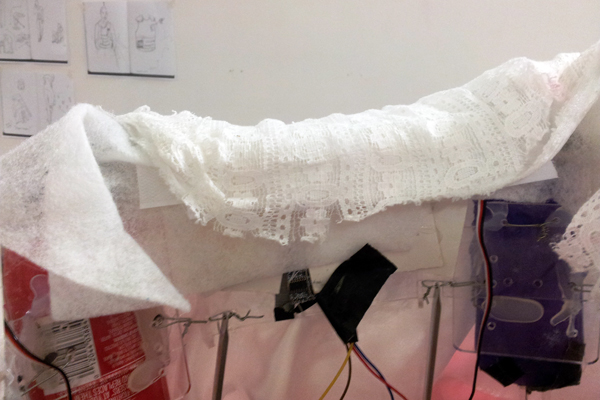
3. Insulate the structure and drape the fabric
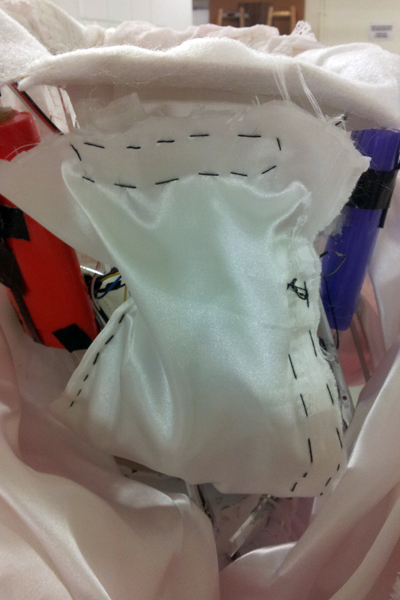
I made a simple pocket out of cloth, I sewed two sides shut, and secured the other two sides with velcro, for easy access to the parts. I don’t have access to a sewing machine, so I stitched this very messily, by hand. Later I just started hot glueing the velcro on… I should probably take a sewing class.

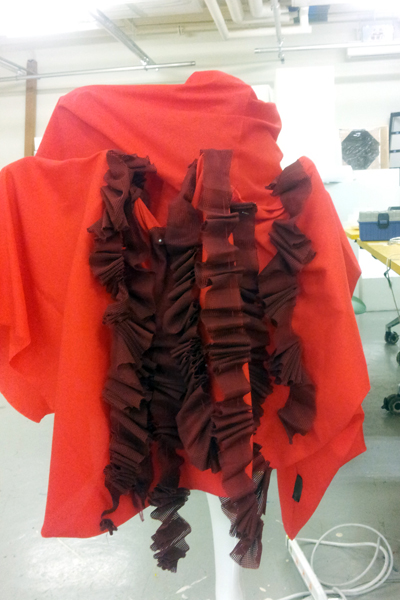
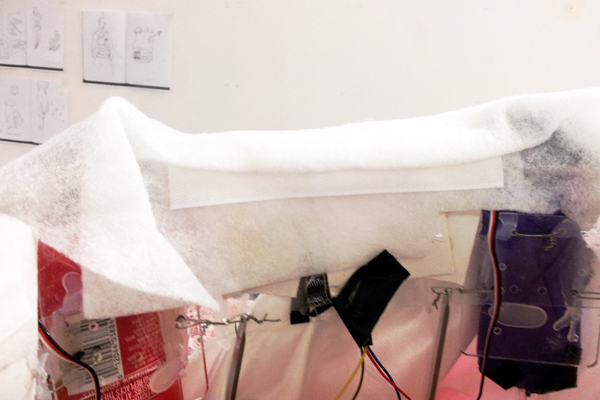
If you drape fabric over your structure as it is, you’ll find the arms look very sharp. I fattened mine out with filters meant for stove tops. I was looking for flat foam but I couldn’t find any and this worked fine. Just beware that thickening the arms will cause them not to close as tightly.

The motor are higher than the belts, and this will cause a strange waistline. Maybe those of you who are fashion savvy can figure out a cool way to make this work, but I decided to even out the waist line by folding card stock to create a lip, and hot glueing it to the base. It’s not pretty, but it’s strong. This creates the effect of a built out waist line, which makes the real waist look narrower. I was inspired by these judy jetson-esque get ups:

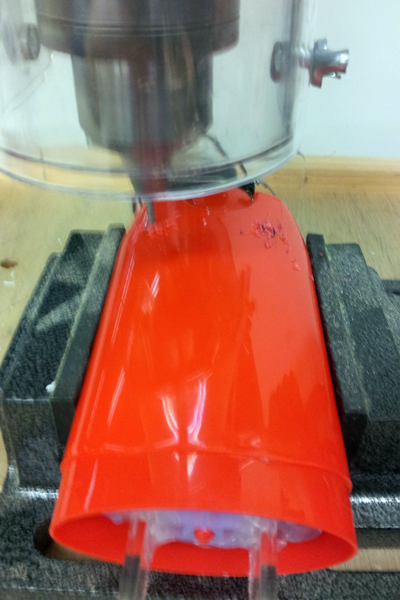
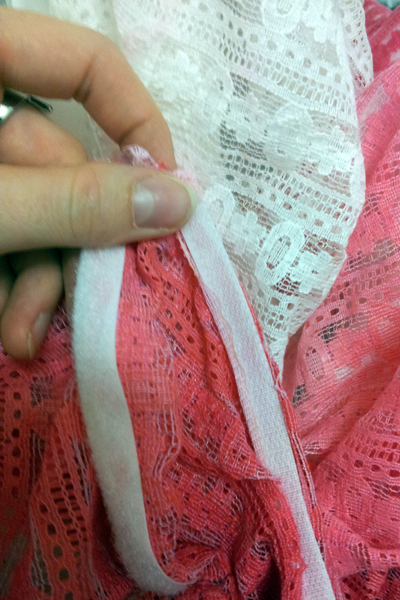
This is the fun part after all the hard work! I tried experimenting with different fabrics before I decided to use the white lace (which I then dipped in red dye to create a gradient.) I also ended up adding a second tier of drapes, which I think makes it look more like a cupcake and less like an umbrella.


I pinned the fabric first while the dress was closed, (It’s very helpful to have a mannequin or patient model at this point) then ran the program to open it, and adjusted the pins accordingly. It’s a bit of back and forth, because as you’ll find, the tension of the cloth needs to be just right, in order to get all the arms equally spaced. Definitely put it on the person who is going to wear it before sewing anything.
Now because this is electronic, you do want to be able to access it easily. I lined the inside of my belt with velcro, and simply attached the fabric to it, this way the whole top piece comes on and off.
I also added velcro to the seam that needs to open, for the wearer to get the dress on and off.
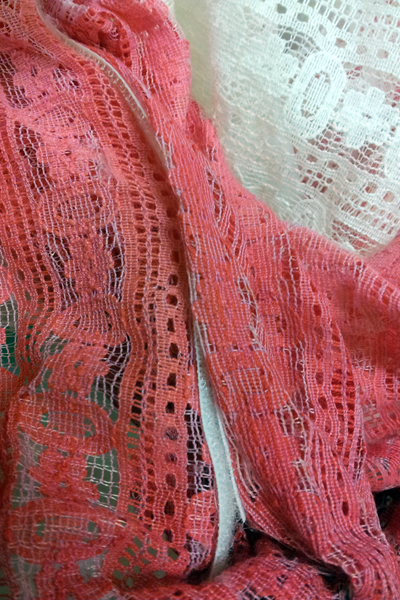
The plastic halves lace together like this, which makes them somewhat adjustable. Excuse the gunk, it is from duct tape when I was taping it to my mannequin.
I think that’s everything! Good luck, and please let me know if you have problems or success in the Comments which are living on their own page.
